
Get stable checkout plugins 2026 right
Before you install a checkout plugin, you need to ensure your store’s foundation can handle the added complexity. A stable checkout is not just about a faster button; it is about data integrity, payment reliability, and user experience. Skipping these prerequisites often leads to broken carts, lost sales, or security vulnerabilities.
First, audit your existing theme and plugin conflicts. Checkout plugins inject JavaScript and CSS directly into the checkout flow. If your current theme uses outdated templates or conflicting scripts, the plugin may fail to load or break the layout. Test your current checkout in an incognito window to identify any existing friction points before adding new tools.
Second, verify your payment gateway compatibility. Not all checkout plugins support every payment provider, especially newer or regional options. Ensure your chosen plugin explicitly supports the gateways you use, such as Stripe, PayPal, or local alternatives. Incompatibility here can result in failed transactions or customers being unable to complete their purchase.
Finally, check your server resources and caching settings. Checkout plugins often require real-time calculations for shipping and taxes. If your server is under-resourced or your caching plugin is too aggressive, these calculations may fail or serve stale data to users. Coordinate with your hosting provider to ensure your environment can handle the increased load during peak traffic.
Set up your stable checkout plugin
Reducing cart abandonment starts with removing friction before it happens. A stable checkout plugin acts as the guardrails for your payment flow, preventing the crashes, slow loads, and confusing fields that drive shoppers away. By implementing a reliable solution, you ensure that your store remains operational during traffic spikes and that the payment process feels effortless to the buyer.
1. Audit and prepare your current checkout
Before installing new software, remove the obvious blockers. Check your existing checkout page for broken links, missing shipping rates, or confusing form fields. Ensure your payment gateways are fully configured and tested in sandbox mode. A clean foundation prevents the new plugin from inheriting old errors. If your current setup is unstable, consider a complete replacement rather than patching a broken system.
2. Select a plugin focused on stability
Not all checkout plugins are built for high traffic. Look for solutions that offer server-side validation and minimal JavaScript bloat. This reduces the chance of the checkout page freezing when a customer clicks "Pay Now." Prioritize plugins that support one-click purchases and guest checkouts, as these features significantly lower the barrier to completion. Read recent reviews to verify that the developer provides consistent updates and reliable support.
3. Install and configure the core settings
Once you choose a plugin, install it and connect your payment gateway credentials. Configure the basic settings: enable guest checkout, disable unnecessary form fields like company name or fax, and set up automatic tax calculations. Test the integration by placing a real order with a small amount. This step confirms that the plugin communicates correctly with your payment processor and that the order data appears in your admin dashboard.
4. Optimize the user interface
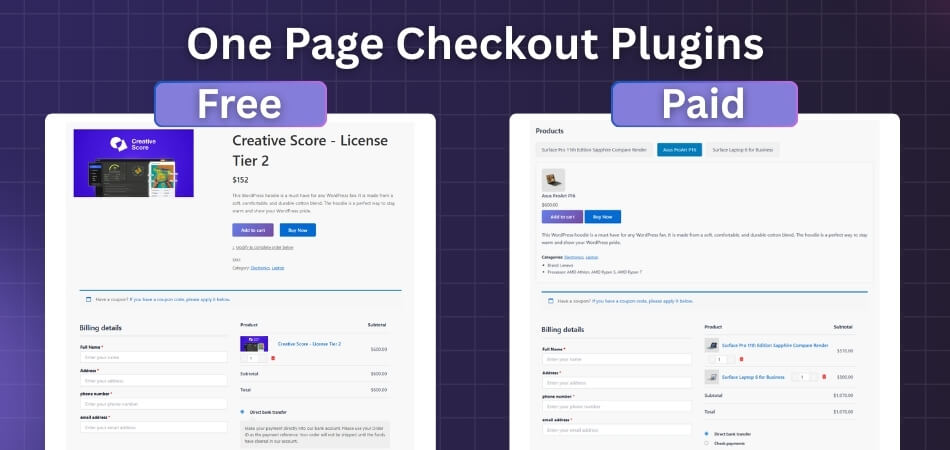
Stability isn't just about code; it's about clarity. Use the plugin's customization tools to create a single-page checkout if possible. This keeps the customer focused and prevents them from getting lost in multiple redirects. Add trust badges near the payment button and ensure the "Pay" button is large and clearly labeled. Avoid cluttering the page with excessive upsells that can distract from the primary action.
5. Test across devices and networks
Your customers will checkout on phones, tablets, and desktops. Test the entire flow on each device type to ensure buttons are clickable and forms are readable. Simulate slow network conditions to see if the checkout page handles timeouts gracefully. If the page spins indefinitely, your plugin may need better error handling. Fix these issues before launching to the public.
6. Monitor and iterate
After launch, keep an eye on your abandonment rate. If you see a spike in drop-offs at a specific step, investigate the cause. Is the payment gateway rejecting valid cards? Is a field too confusing? Use analytics to identify bottlenecks and adjust your plugin settings accordingly. Continuous monitoring ensures your checkout remains stable as your traffic grows.
-
Remove broken links and missing shipping rates
-
Configure guest checkout and disable unnecessary fields
-
Test payment gateway integration in sandbox mode
-
Verify single-page checkout on mobile devices
-
Monitor abandonment rate for one week after launch
Fix common mistakes
Even the best stable checkout plugins can’t save a checkout flow built on shaky foundations. If your conversion rates are dropping, the problem usually isn’t the payment gateway—it’s how you’ve configured the experience. Below are the most frequent configuration errors that drive shoppers away, and how to correct them.
Forcing account creation
Requiring users to register before purchasing is the fastest way to kill impulse buys. Shoppers expect to check out as guests. Most modern plugins offer a "guest checkout" toggle. Enable it immediately. You can always ask users to create an account after the payment is confirmed, perhaps offering a small discount for doing so.
Too many form fields
Every extra field in your checkout form increases friction. If you don’t need a middle name or company address, don’t ask for it. Use your checkout plugin’s field manager to hide non-essential inputs. The goal is to get from "add to cart" to "order confirmed" in the fewest clicks possible. Simplify the form to name, email, shipping address, and payment details only.
Hidden costs until the final step
Surprising customers with high shipping fees or taxes at the very last page is a major abandonment trigger. Display estimated shipping costs earlier in the process, ideally on the cart page or via a zip-code estimator on the checkout page. Transparency builds trust. If you offer free shipping, make that clear on the product page so the expectation is set early.
Poor mobile optimization
More than half of your traffic likely comes from mobile devices. If your checkout buttons are too small to tap or forms require horizontal scrolling, you will lose sales. Test your checkout flow on a real smartphone. Ensure the "Place Order" button is sticky and visible at all times. Use your plugin’s mobile preview mode to catch layout breaks before they go live.
Stable checkout plugins 2026: what to check next
Readers often worry that adding a third-party plugin will bloat their site or break existing features. Before installing a stable checkout plugin, it helps to understand how these tools actually interact with your platform.
Helpful gear
Use these product recommendations as a starting point, then choose the size, material, and price point that fit how you actually use the gear.



As an Amazon Associate, we may earn from qualifying purchases.
Work through Reduce Cart Abandonment
No comments yet. Be the first to share your thoughts!